You should now be looking at a y-shaped object in the color of your choice in the viewing environment. From here, there are several viewing options available to you. Try experimenting with the different tools described below.
 The toggle objects buttons are associated with each object in the viewer. Clicking on the name of the object will make it visible or invisible. Clicking on the lightbulb icon will allow you to set the shininess and opacity of the object
 The frames button lets you choose what kind of object you rotate in the viewer. Try cycling through each of the types, then click and drag your Y object with each one selected to see the difference between them.
 The fixed/free axis button lets you choose between constrained rotation (i.e. rotation on the x/y axis only) and free rotation (i.e. rotation on all three axies). Try rotating your object with each setting to see the difference.
 The contrast button sets the contrast of the entire image. A larger value makes darks darker and lights lighter.
 The background color button sets the color of the screen behind the objects.
 The zoom button allows you to zoom in or away from the objects.
 The smooth button smooths your object's surface. Smoothing can be done repeatedly, however the more times it is done, the more the object deviates from the original shape.
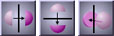 The x-flip, y-flip and z-flip buttons reverse the image across the axes of the object.
 The camera button allows you to export the current view to a bitmap file, while the Quicktime VR button allows you to export a series of images which can be later be made into a QuicktimeVR image.
 The measure button allows you to measure between two points on the object. Click on this tool, then on the object to mark the first point. Repeat for the second point. You will be returned the measured distance.
 The disk button allows you to export files, either in the SURFdriver Quicksave format (like the Jaw Group file), or as a DXF or IGES file for use with other 3D programs.

